BLOG

How to edit photos for a perfect white background
You've got your photos against a white background; trouble is, the white background is a bit grey. Don't panic, it's a quick fix.
Guest post: Emma Davies
You've got your photos against a white background; trouble is, the white background is a bit grey. Don't panic, it's a quick fix.
Here's how fix a grey background in Lightroom:
If you don't have Lightroom, try using the 'Brightness' filter in the free photo editor Canva.com. You don't get the same degree of fine control - it brightens the whole image not just the whites - but it's better than a gloomy photo.

More image editing tips at: emmadaviesphotography.com
Narcissus Styling
Guest post: Vanessa Birley.
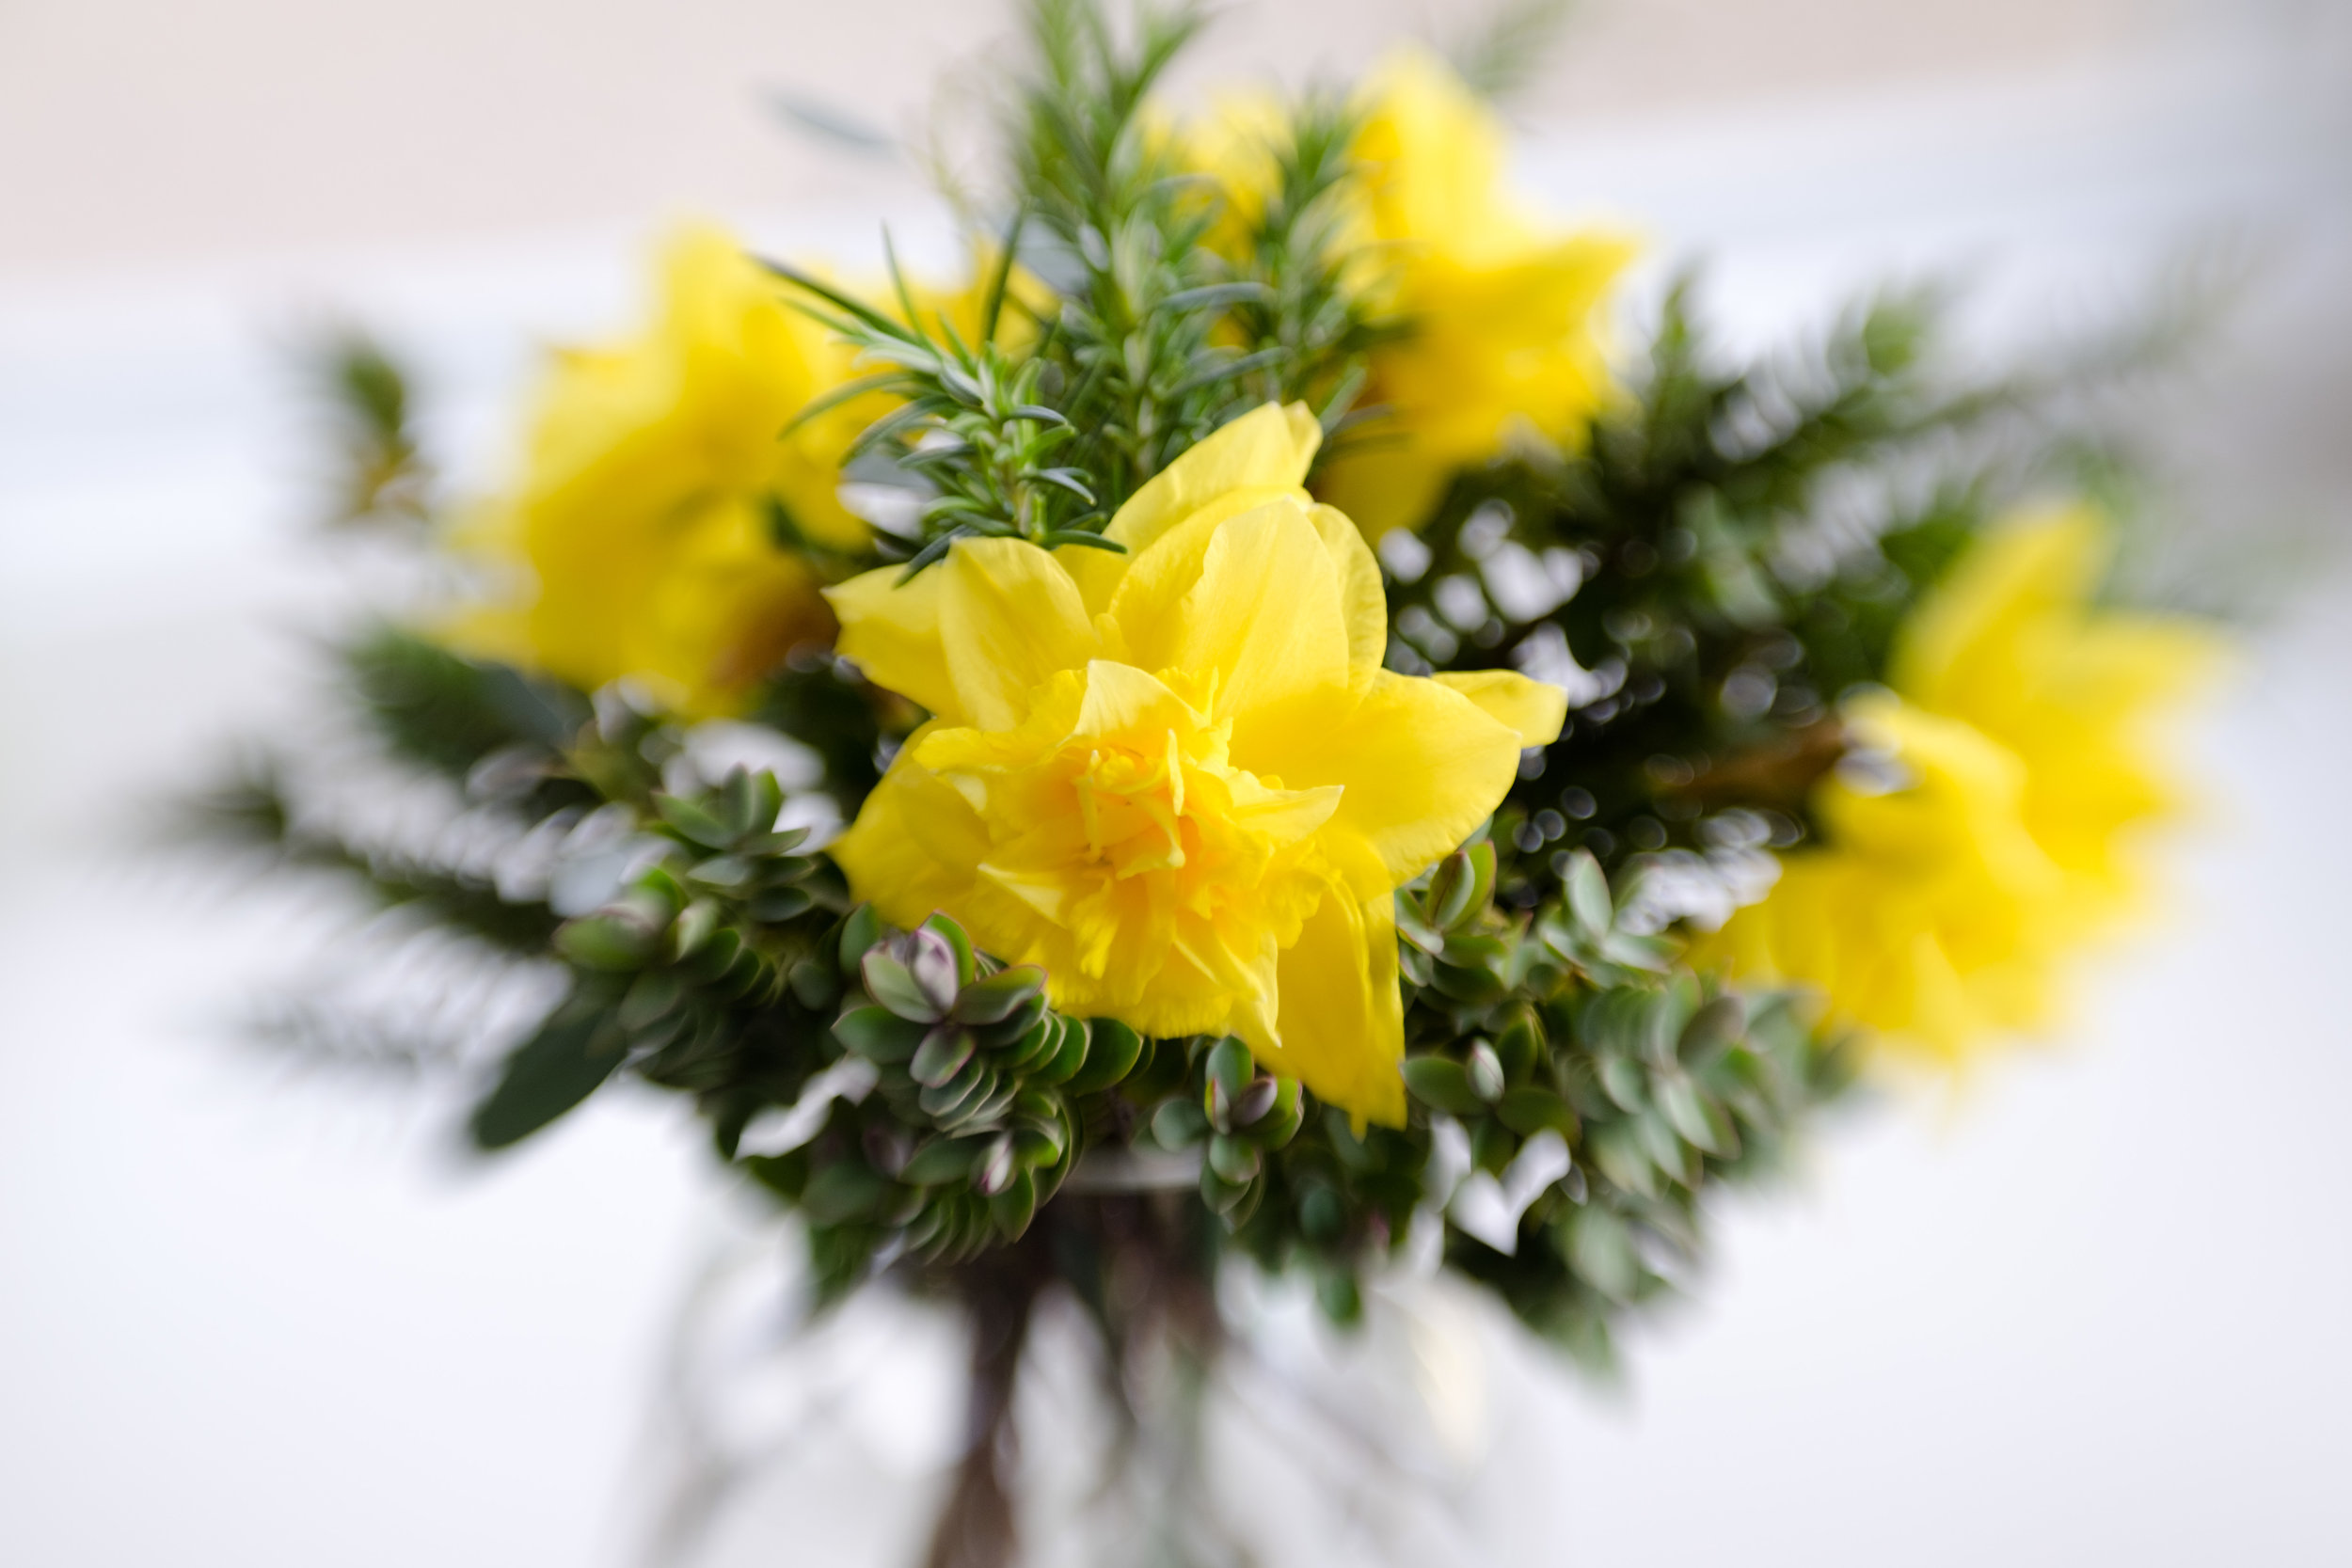
For our first British flower up close focus, we have chosen the narcisuss as our January flower of the month. Symbolising new beginnings, an apt premier flower indeed.

Guest post, Vanessa Birley
For our first British flower up close focus, we have chosen the narcisuss as our January flower of the month. Symbolising new beginnings, an apt premier flower indeed.
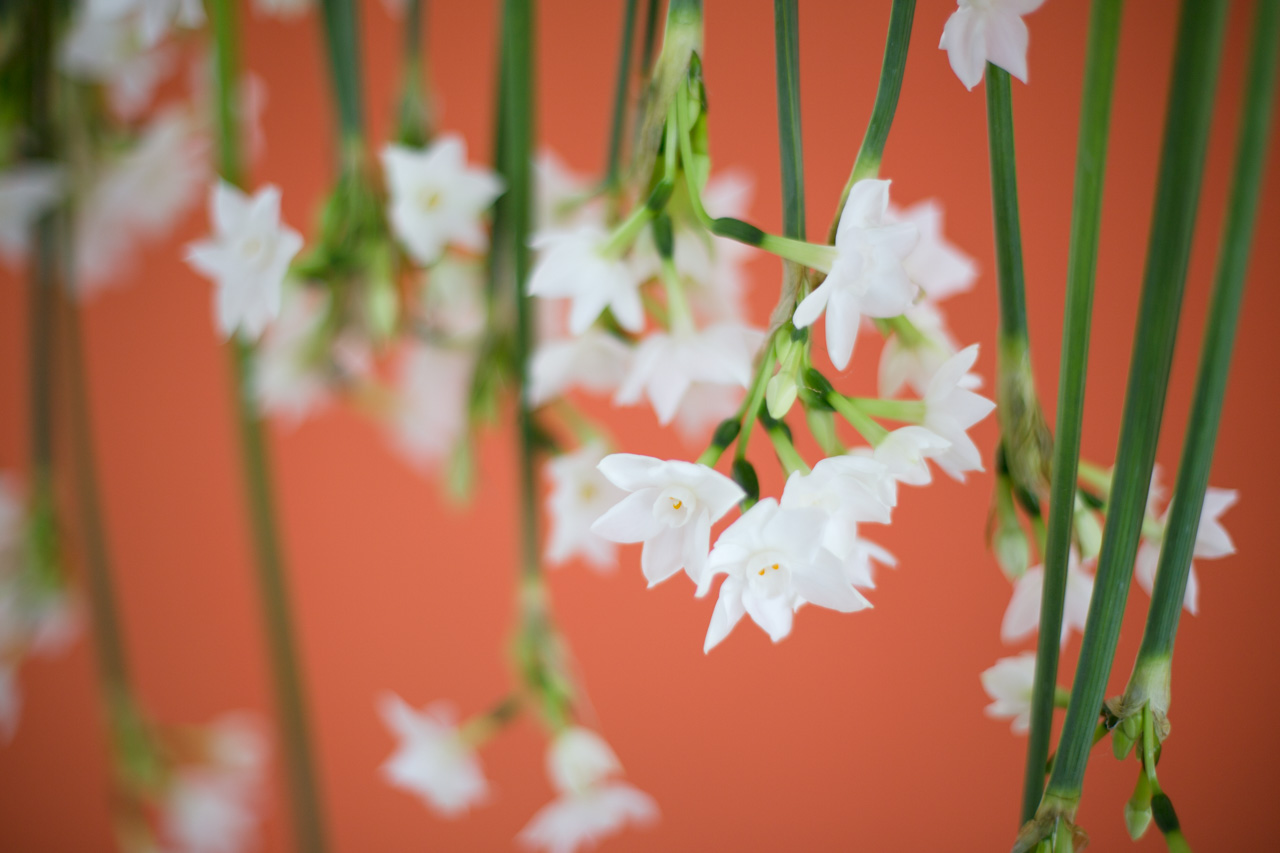
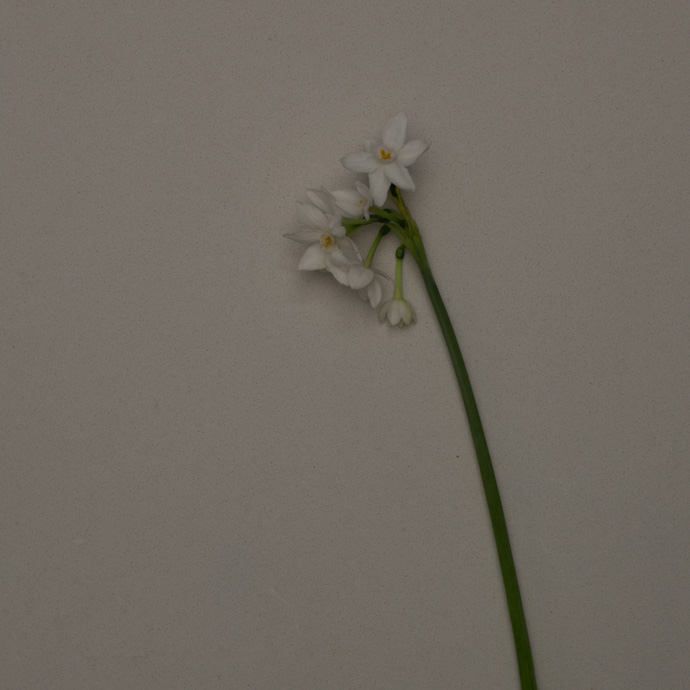
More specifically, our focus is the heavenly scented paperwhite narcissus. Its name originates from a Greek myth. As it is known, Narcissus was not only a hunter but he was also known for his beauty. When he came upon his own reflection in a pool of water he was unable to leave it. Hence, where we get the term narcissist – a person who is overly in love with themselves.
We could focus on the negatives of this little flower, but perhaps it would be more productive to bring our attention to the fact that it symbolises new beginnings as well. As one of the earliest bulb flowers to come to life in winter, I’d say that’s a pretty significant accomplishment.
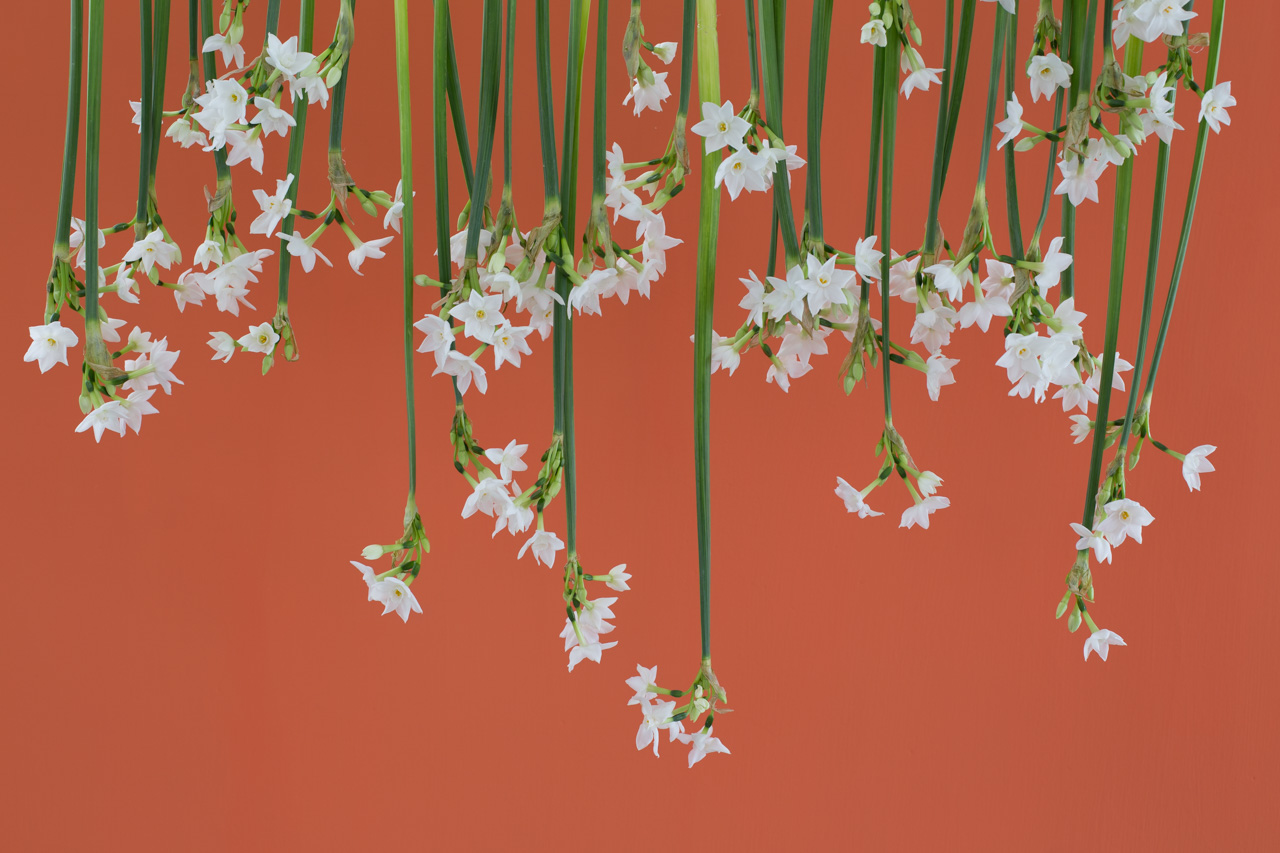
Looking superb as a stand-alone flower: simply fill a jug or vase with a bunch of these to beautify any area, or incorporate with a multitude of spring flowers.
NB. Narcissus secrete a sap after being cut which is poisonous to other flowers. Cut the stems & leave for 24 hours before mixing with other flowers.
Emma & I chose to capture the paperwhite in a more dynamic & stirking way: by suspending upside down.
After painstakingly tying each stem with fishing wire onto a horizontal bar, Emma captured my handiwork with the following video.
Hope you enjoy it!

How to shoot flowers on a white background
Guest post, Emma Davies
Have you ever wondered why your white background photos come out a bit grey? This post explains why, and shows you how to fix it.
Guest post, Emma Davies
The British Flowers Book is part textbook, part inspiration, and Claire wanted the photographs to reflect both these aims. For the inspiration parts, we aim to show the variety of British flowers available throughout the year, in different settings.
A look forward to Caroline Davy's shoot in April
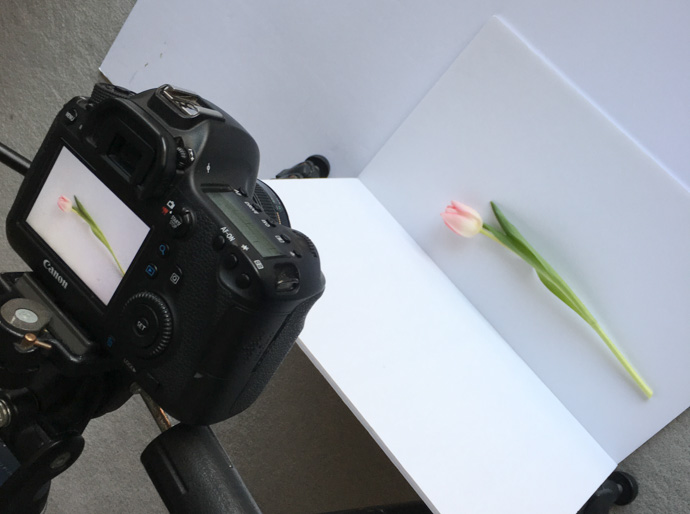
For the information sections of the book the flowers are set against a white background for easy identification. Shooting flowers, or anything, against a clean white background is straightforward once you realise the camera is fooled by the white background.
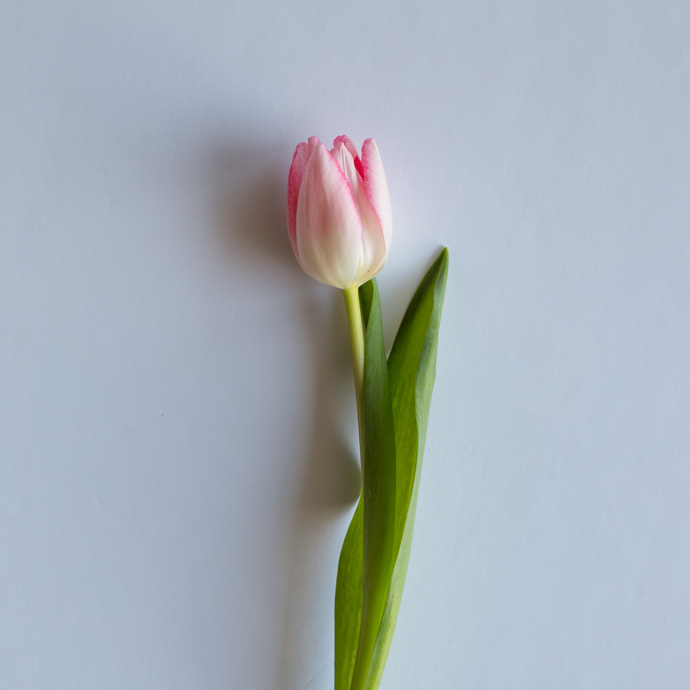
When you shoot against a white background, does it come out like the first photo, not the second?

If you are using a phone, or shooting on auto modes, this happens because the camera is programmed to see the entire world as a mid-grey tone, and it turns everything it sees to that same mid-grey tone.
If what you are shooting is actually very light (or very dark), the camera will under (or over) expose in its attempt to achieve the mid-grey tone.
In this post I'll show you how to get the clean white background first time round in camera (2 ways, one with a tripod and one without), and in my next post, later this month, I'll show you how to fix the problem afterwards in editing.
How to get a white background
1. Set yourself up close to a window
Unless you have studio lights, I'm assuming you'll be working during the day using natural daylight. Get as close as you can to a window that is not in direct sunlight (direct sunlight gives you very harsh shadows - not what you want for this style of shot).

Use as clean and uncreased a white background as you can find, to minimise editing. Here I'm using a piece of white foamcore (available from art and craft shops).
2. Turn on aperture priority mode
The most important thing for this shot is that the tulip is sharply in focus from front to back. I need to make sure the aperture is at least f8, and I don't trust the camera on auto to choose that.
On aperture priority mode I choose the aperture, and the camera picks the other settings (shutter speed and ISO). This is still an auto mode, so we will still get the grey background problem.
If you don't know how to switch over to aperture priority, have a look in your manual.
3. Fix the under exposure problem
Because there is so much white in the image, the camera's auto exposure is fooled. It thinks the world is grey, so it will turn the white to grey (under expose it) unless you override the auto exposure.
You can either do this by shooting fully manual, or just by using the exposure compensation dial. Look up exposure compensation in the manual you just downloaded, and work out how to dial in about +1.5 or +2 stops of compensation. This is simply telling the camera, "What you're looking at is about 1.5 or 2 shades brighter than mid grey."
If you have Live View, turn it on, and you will be able to see what effect your compensation is having on the image. Otherwise, you can see what's happening by finding the exposure compensation scale, that looks a bit like this, in the viewfinder:

*** Don't forget to put the dial back to zero once you've finished. ***
4. Tone down the massive shadow on the side of the flower opposite the window
The second image is the one we're aiming for, not the first:
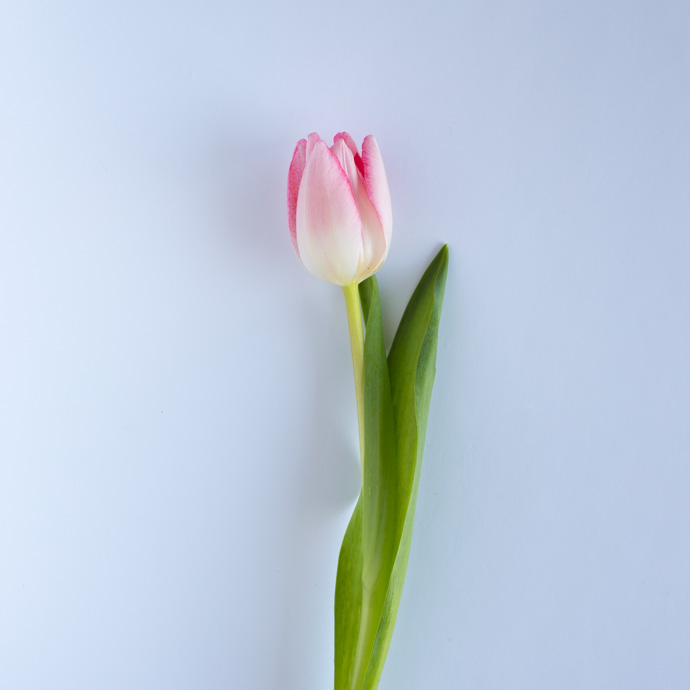
You deal with the shadow by using another piece of white foamcore, or anything else white, to reflect light back into the shadow and reduce it:
The reflector needs to be closer than you think to the flower to soften the shadows
5. Don't have a tripod?
No tripod, no problem.
You won't be able to shoot straight down, but you can use the tried and tested 'pile of books' method to stabilise the camera.
(You need to stabilise the camera because the image will need a long shutter speed, and you won't be able to hand hold the camera and still keep a sharp image.)
Set your flower up next to the window just the same, and with the same white background; you'll just be working straight on:

It's just a little harder to get your flowers in the right place working this way, but the benefit is you get less of a shadow against the background
For extra-sharp images, use the self timer.

Notice how you get no shadow at all on the background using this method. You still need to use a reflector to brighten the shadows on the actual flower.
Do you need basic photography advice?
I run a free, online photography workshop for beginner photographers wanting to learn how to use their big cameras. Join here:

In my next post I'll be showing you how to edit images like these to make sure the white background is as white and bright as it can be, and to get rid of any marks you might have missed on the background.
Viburnum tinus
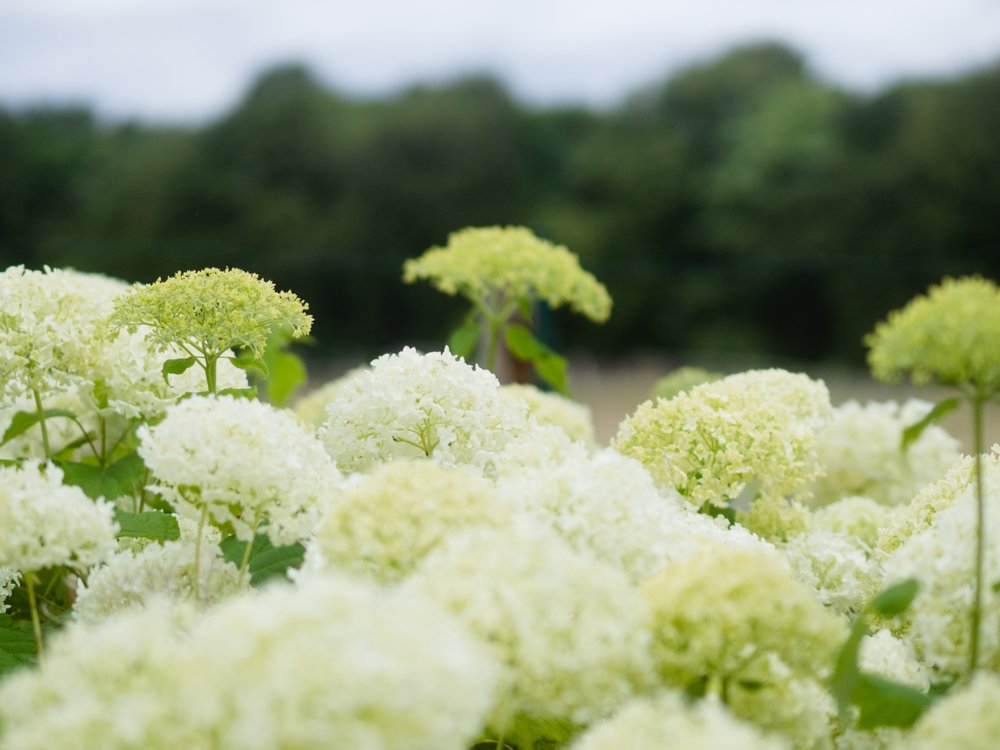
If you want to use flowers in the winter, one of the best sources of both flower and foliage is the flowering shrub that is Viburnum tinus.
If you want to use flowers in the winter, one of the best sources of both flower and foliage is the flowering shrub that is Viburnum tinus.

Viburnum can grow to be a big shrub if left unpruned. But it is often planted too close to paths or boundaries in a garden, and so is pruned to keep it under control. Because it flowers in the winter, from December until February or March, pruning it in the summer will take off the flowering buds. However pruning it in the winter (or live heading it for floral displays) will ensure that it has fresh growth and fresh flowers for the following year
The buds of Viburnums often start off pink, and open to soft pink flowers, which turn to white. It's easy to condition, and will even last out of water for most of a day for those all important bridal bouquets and buttonholes.
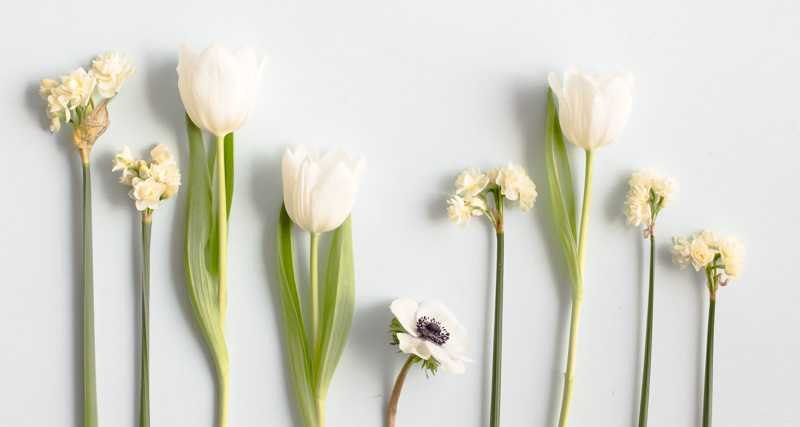
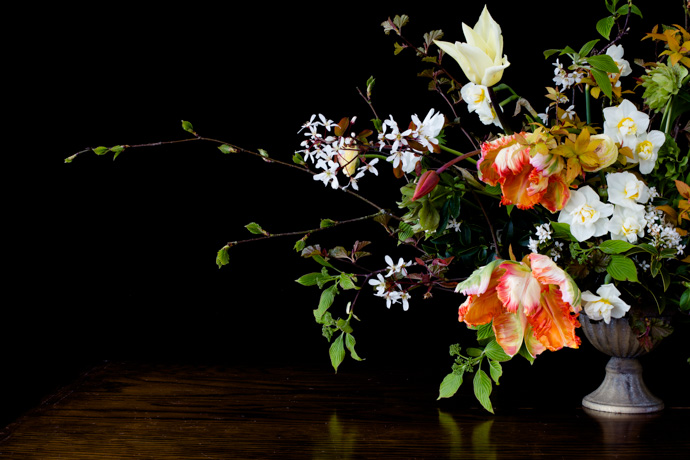
Here it is in a January bouquet paired with Tulips and narcissus.

And for those all important wedding touches

January Styling Ideas

Guest post, Vanessa Birley
You might be thinking… January… British flowers? Isn’t that an oxymoron? Not at all! We are fortunate enough to have some beautiful flowers & a plentiful supply of gorgeous foliage at this time of year. It’s helpful to keep in mind when planning flower designs, that you will not have the same choice from the bounty of summer flowers, however, you do have choice.
The following are a few ideas on working with January’s finest:
1. It may sound obvious, but work with what you have. You can’t force a square peg into a round hole. You may not have flowers with large heads, or bright colours, but look at what you do have & use that to its fullest advantage.
2. Green & white: always a classic & a timeless combination, so work it. Use different tones, textures & shades of green to add interest, for example, fern, variegated pittosporum, sarcoccoa.
3. Consider adding twigs/branches, such as catkin, to your designs for interest, movement & additional shape.
4. Creating designs with one colour will give a sense of harmony & aesthetic unity.
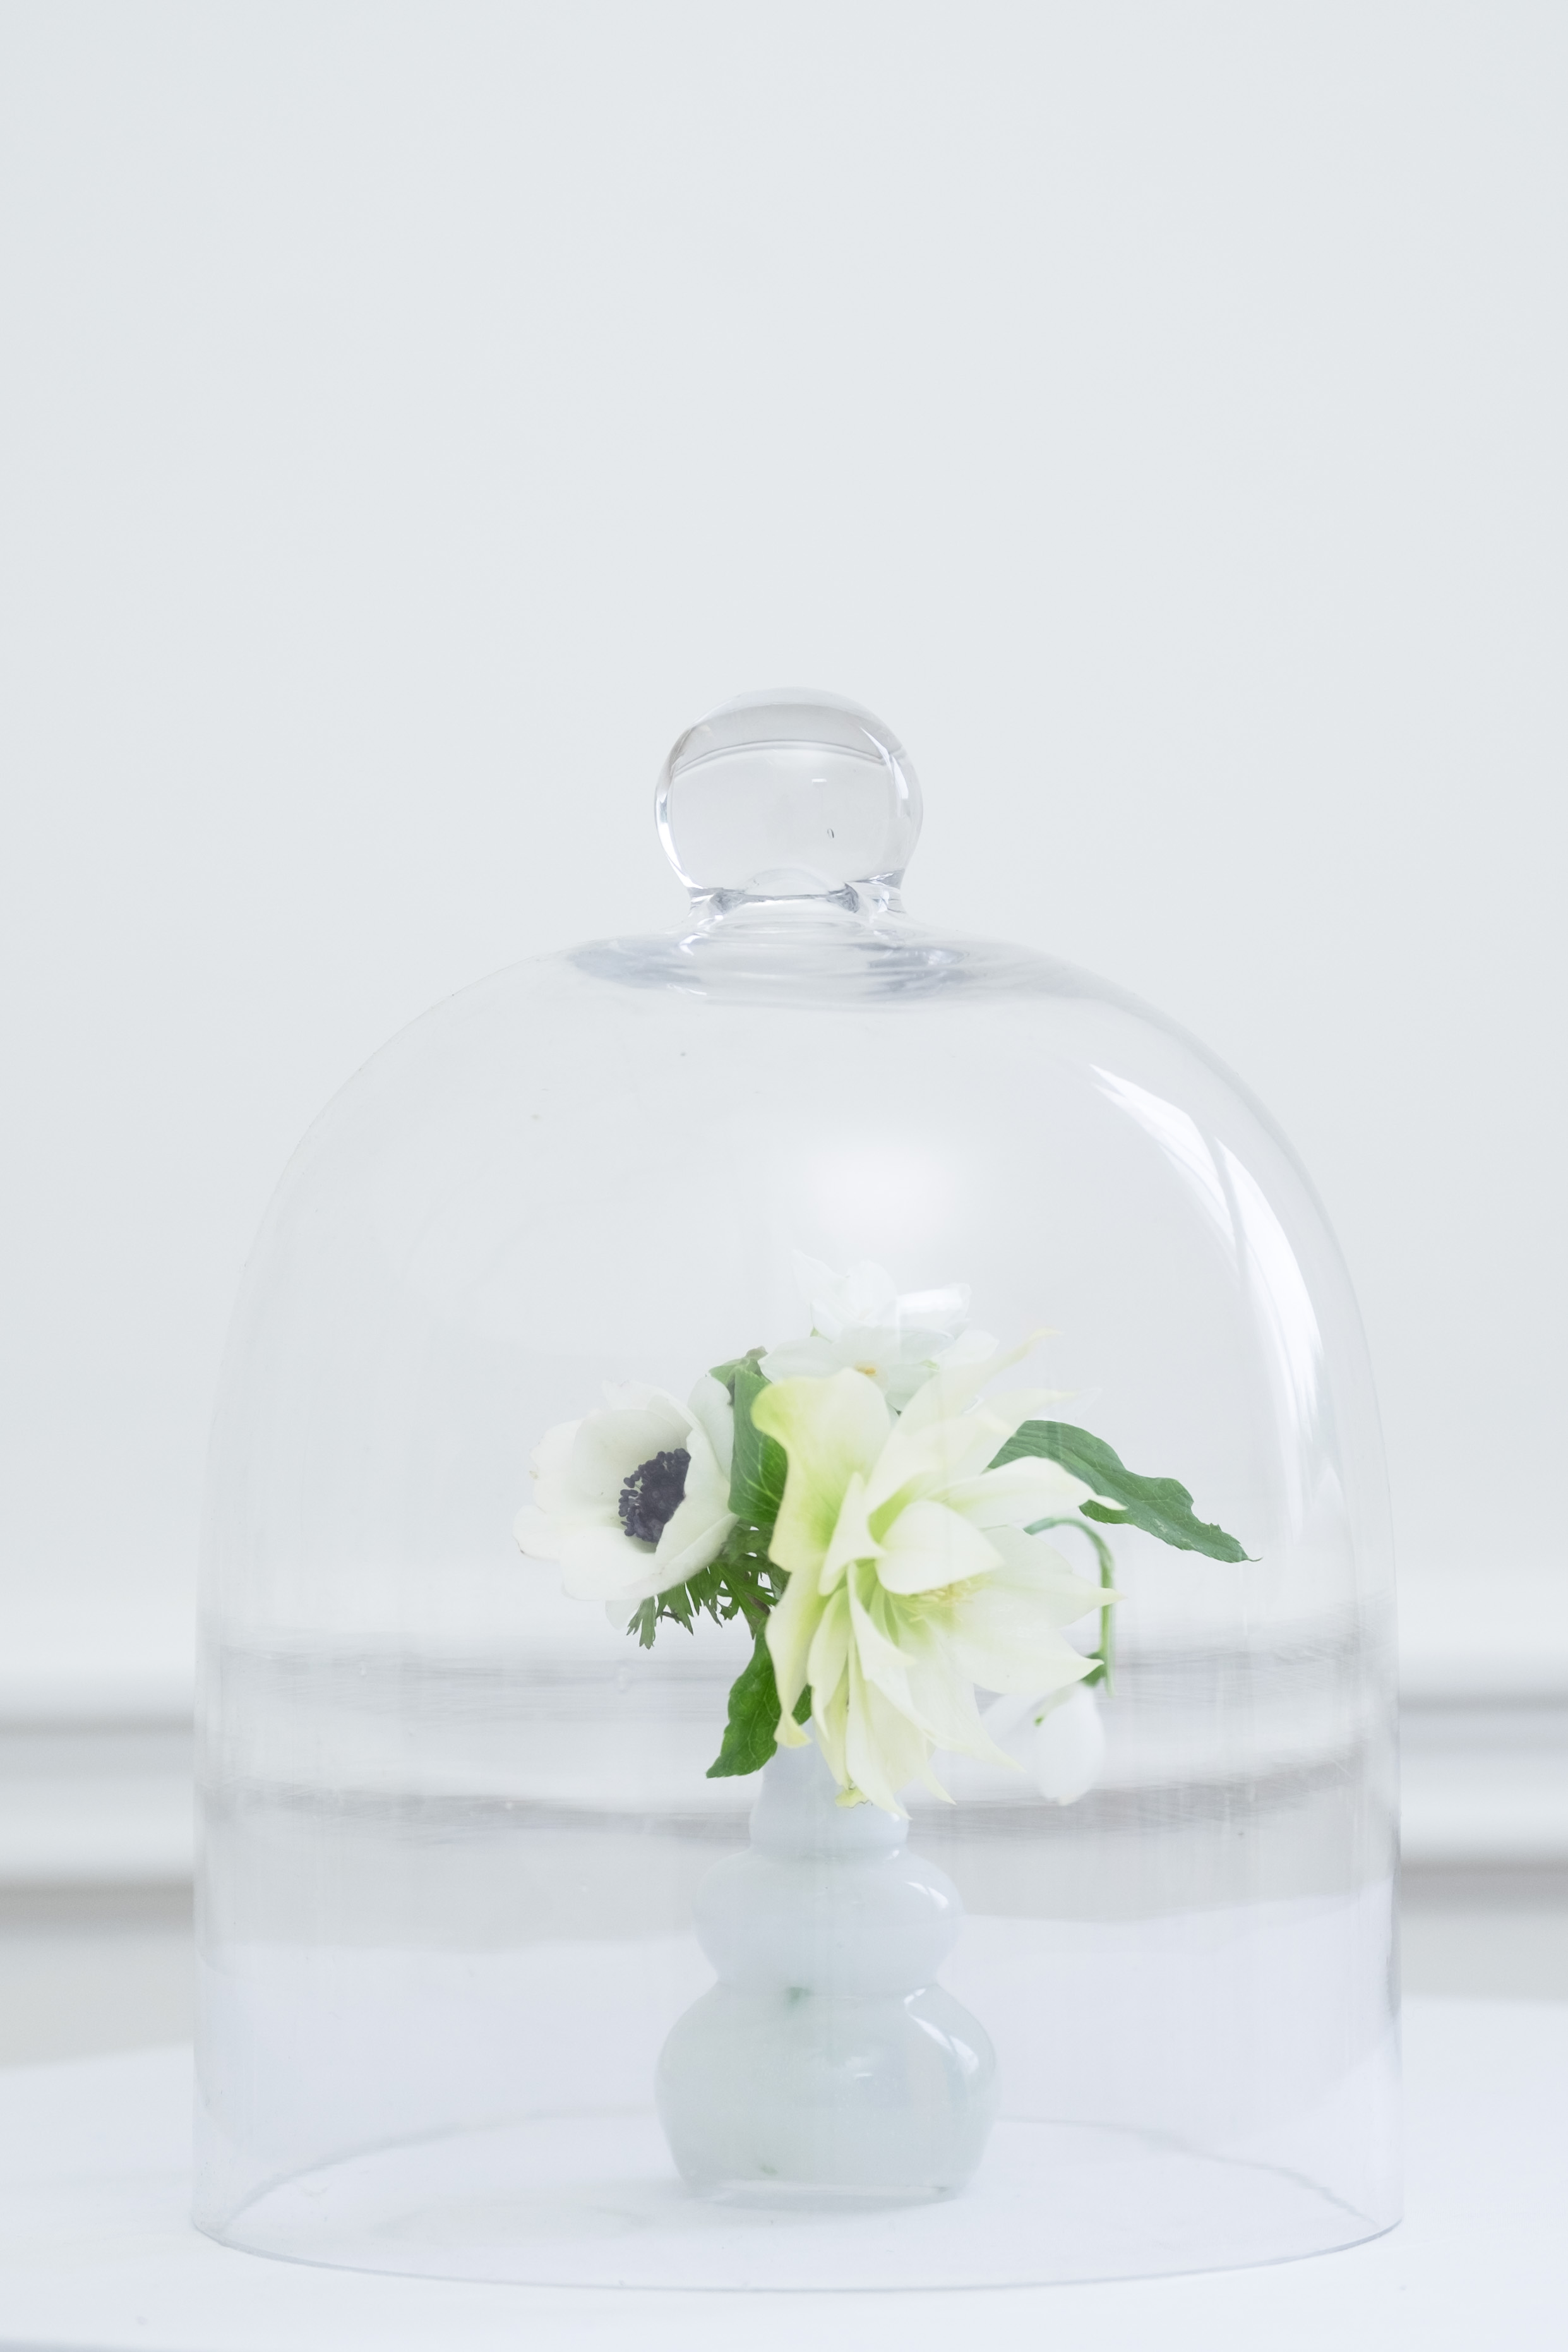
5. Make a focal point of one flower using containers that add appeal. We used anemone & hellebore under a cloche.
6. Repetition in design is an easy way of making a statement. Either by using the same flower, or same container, you can create a visually interesting display.
7. If you’d like your tulips to retain their straighter stems, wrap them in newspaper after you have conditioned them whilst letting them drink water. Otherwise, embrace the tulips natural curvy stem & allow them to weave & wind their way with your design. Also, keep in mind that tulips will continue to grow even after they’ve been cut.
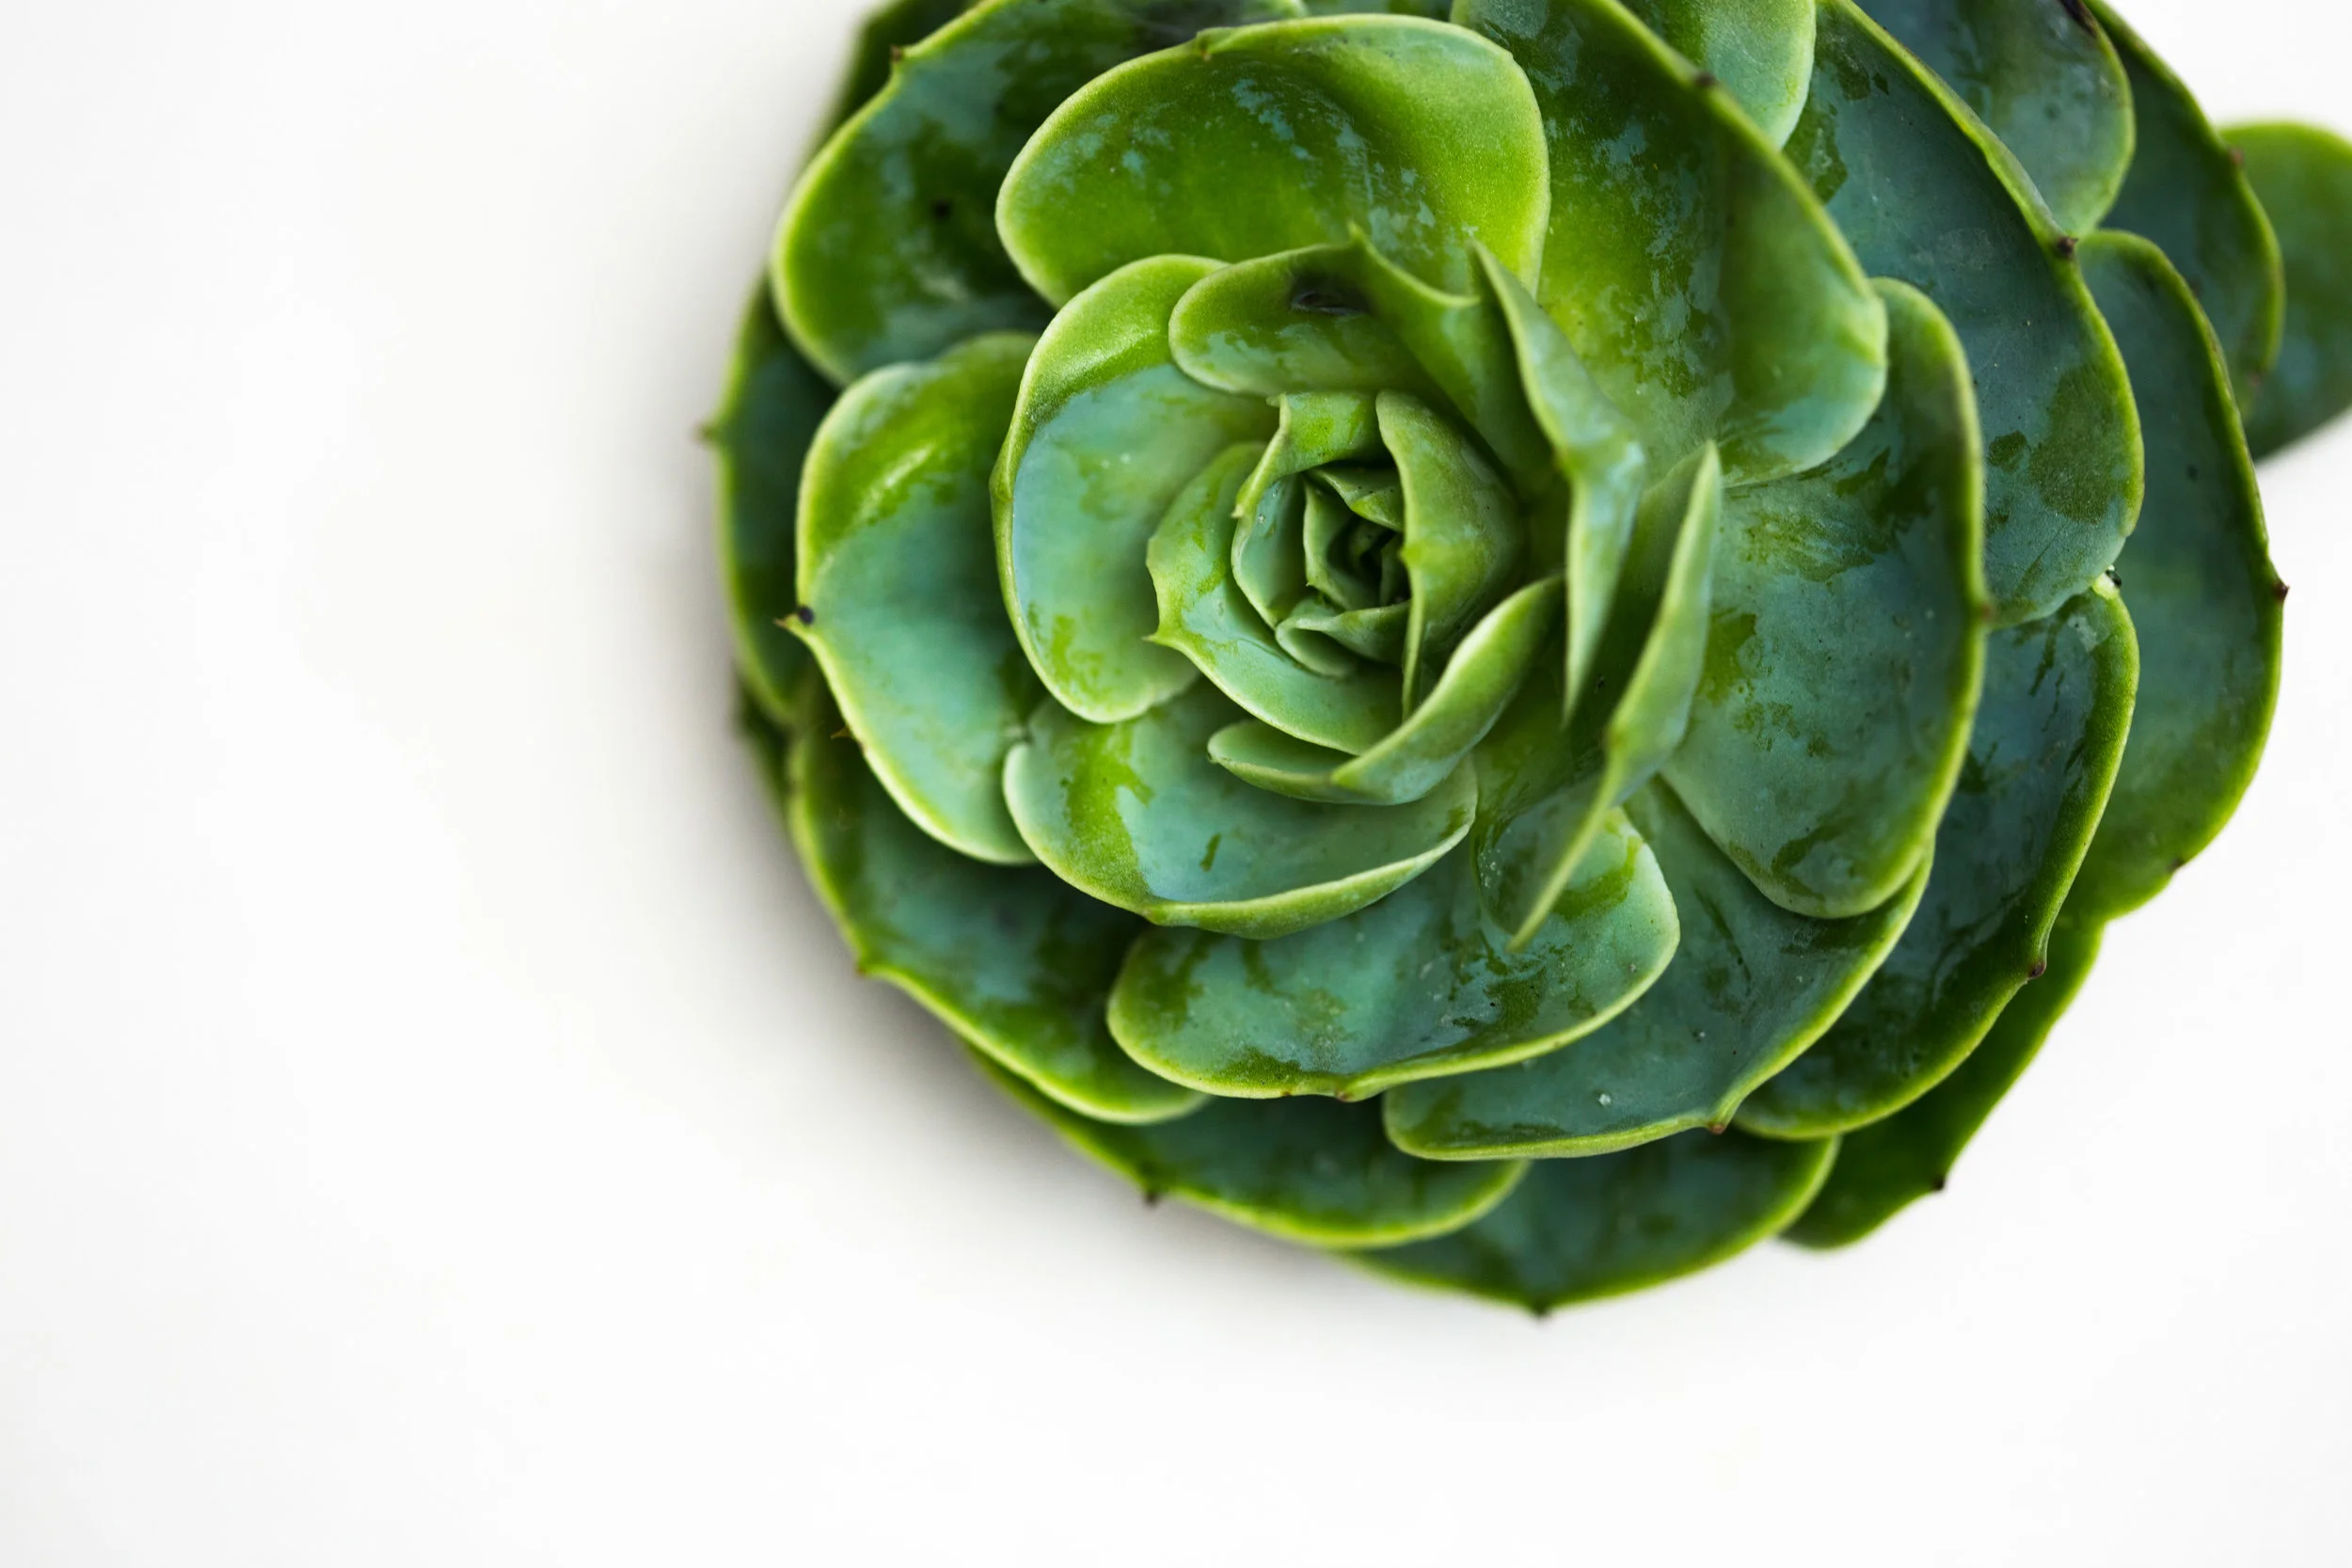
8. Succulents such as echeveria, add a focal point, as well as texture, pattern & colour to a bouquet or arrangement.
9. Alstromeria have a vase life of up to 3 weeks. Keep this in mind when buying – once they are fully open they are at their most beautiful, so use in designs accordingly.
10. One of the huge advantages of using locally sourced rather than imported flowers is scent. Incorporate rosemary & viburnum for a fresh & invigorating fragrance.
Personally, I love the limitations of designing with January’s British grown flowers: having a small colour palette, or smaller variety of botanical ingredients to work with. It means my creative juices have to get flowing & I might stumble on an otherwise intriguing creation that wouldn’t otherwise have materialised. Enjoy delving into working with the possibilities of some distinctive flowers & foliage & you might just surprise yourself.
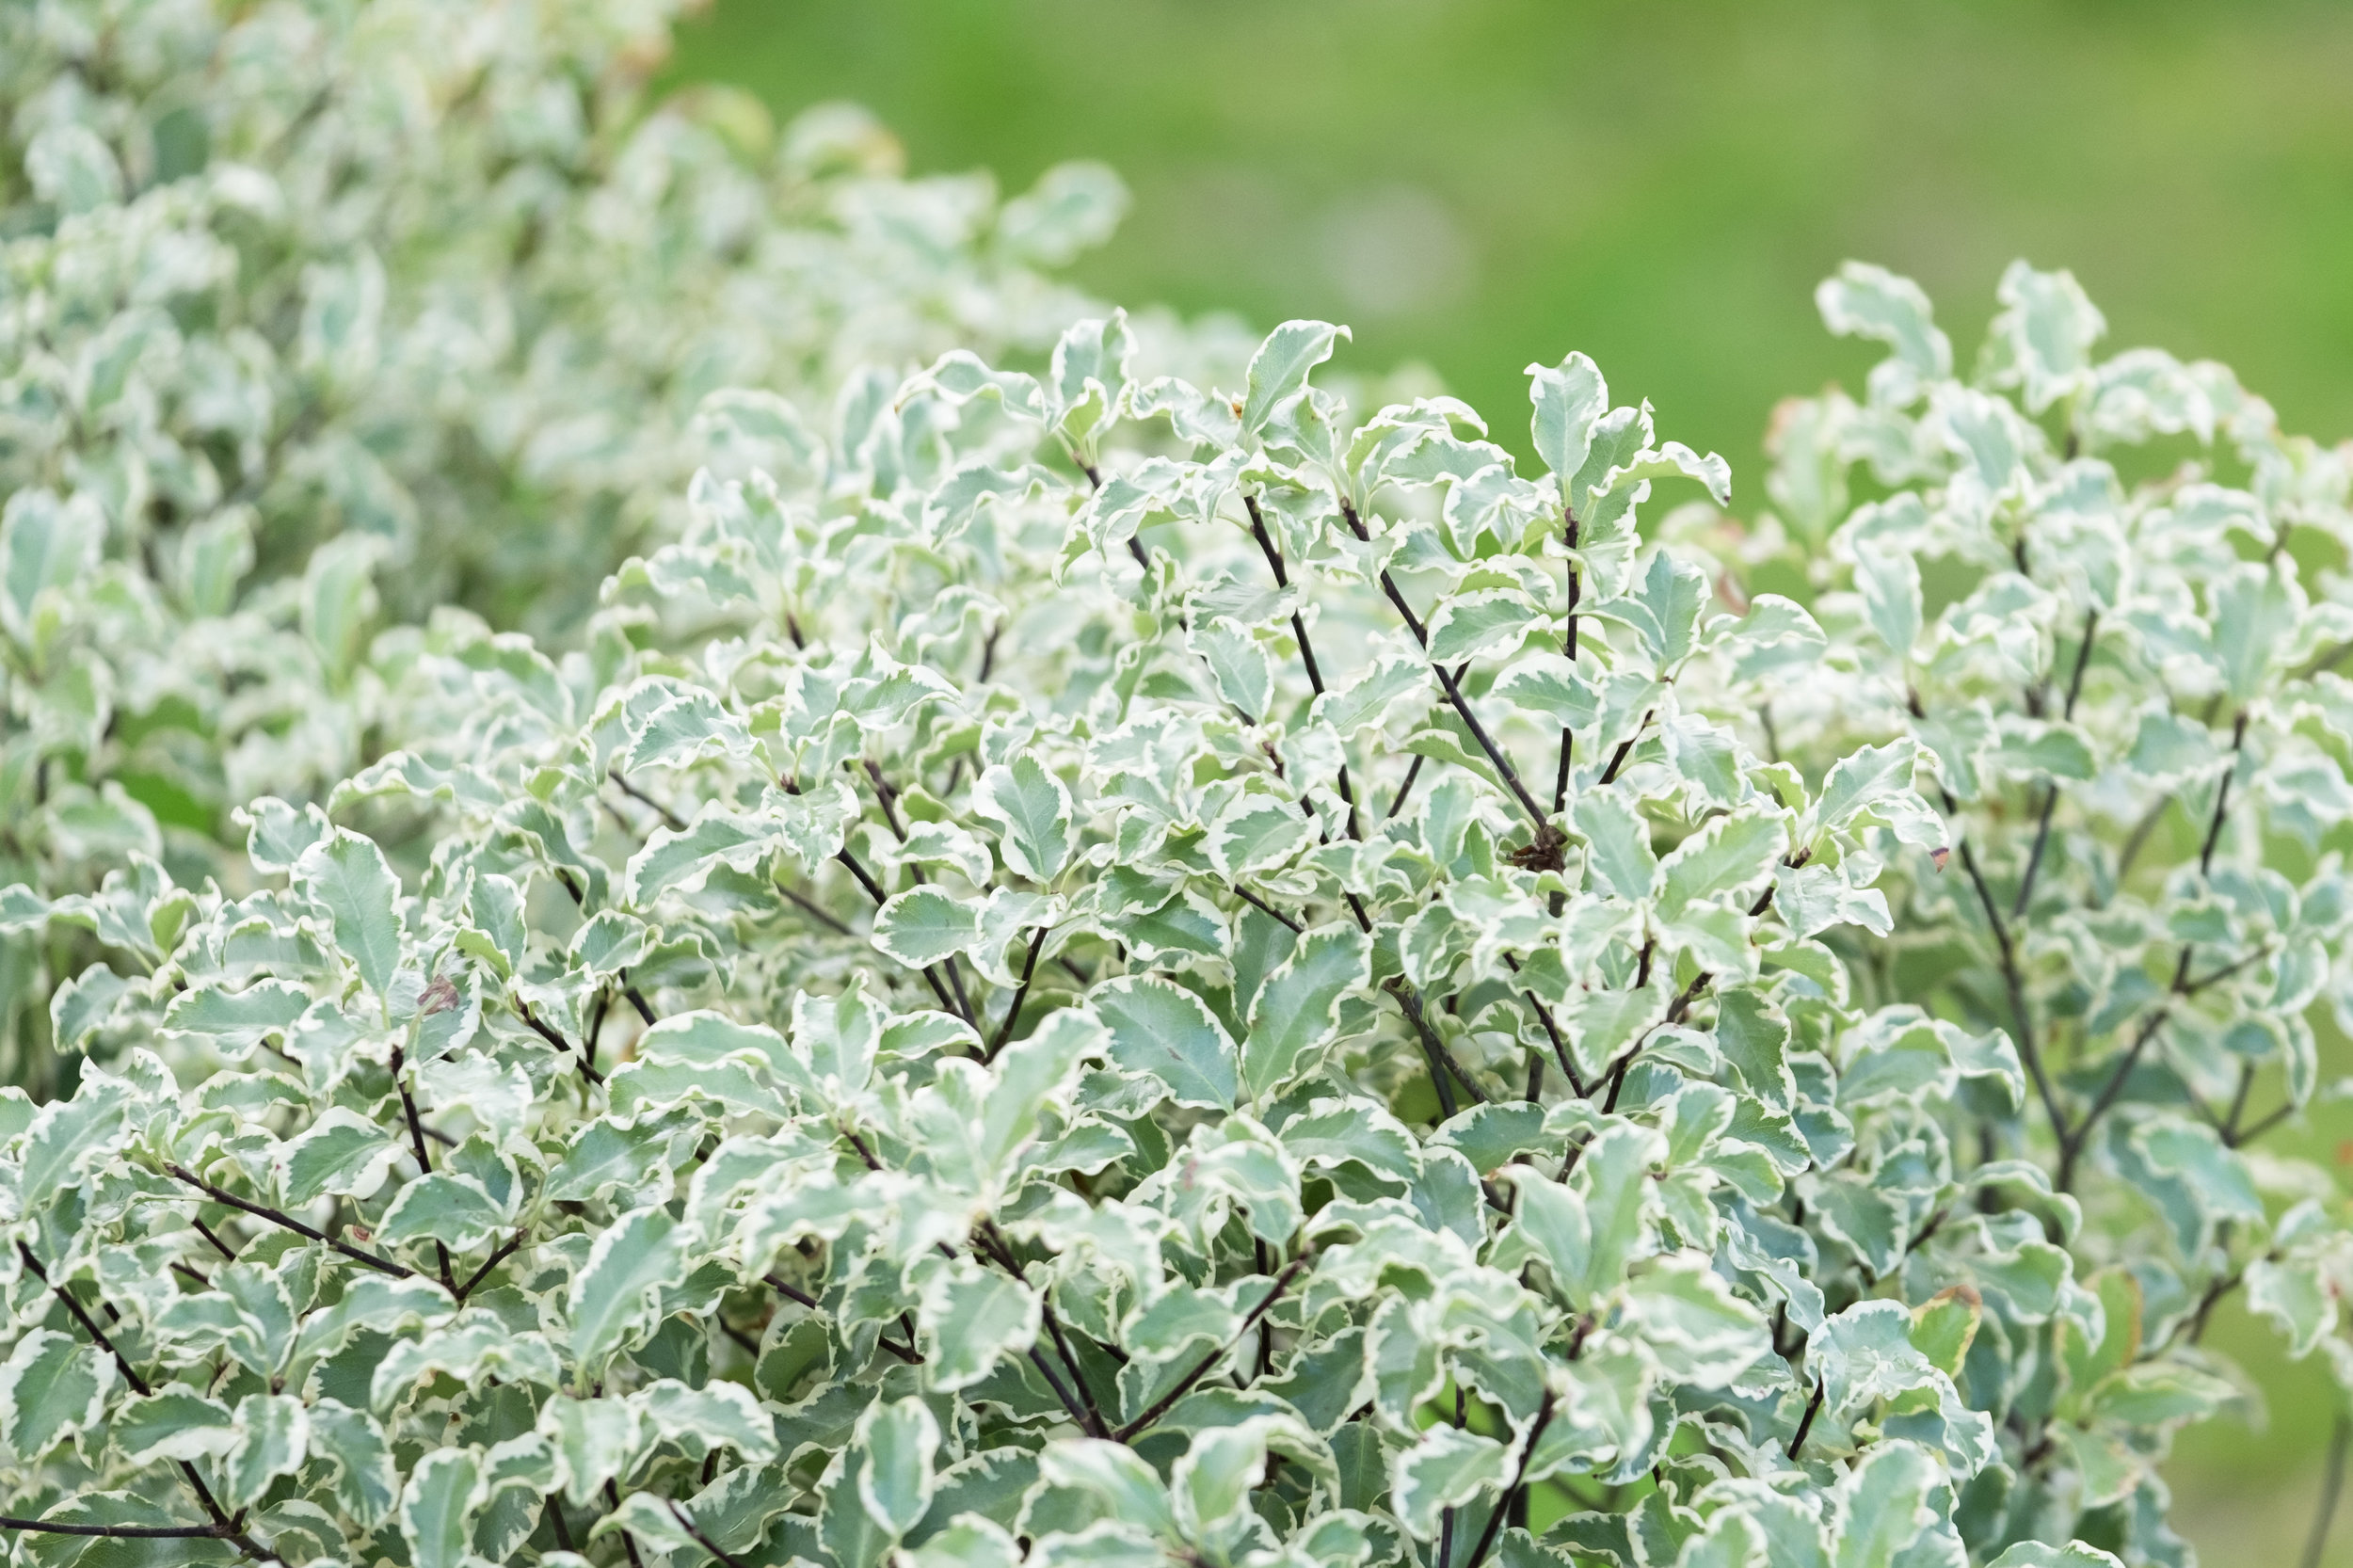
Pittosporum
With the 2017 Pantone colour of the year being "greenery" it's appropriate that as well as the flowers for each of our month's themes, we've got plenty about fillers and foliage. One of the main foliages that we included in our January theme was Pittosporum.
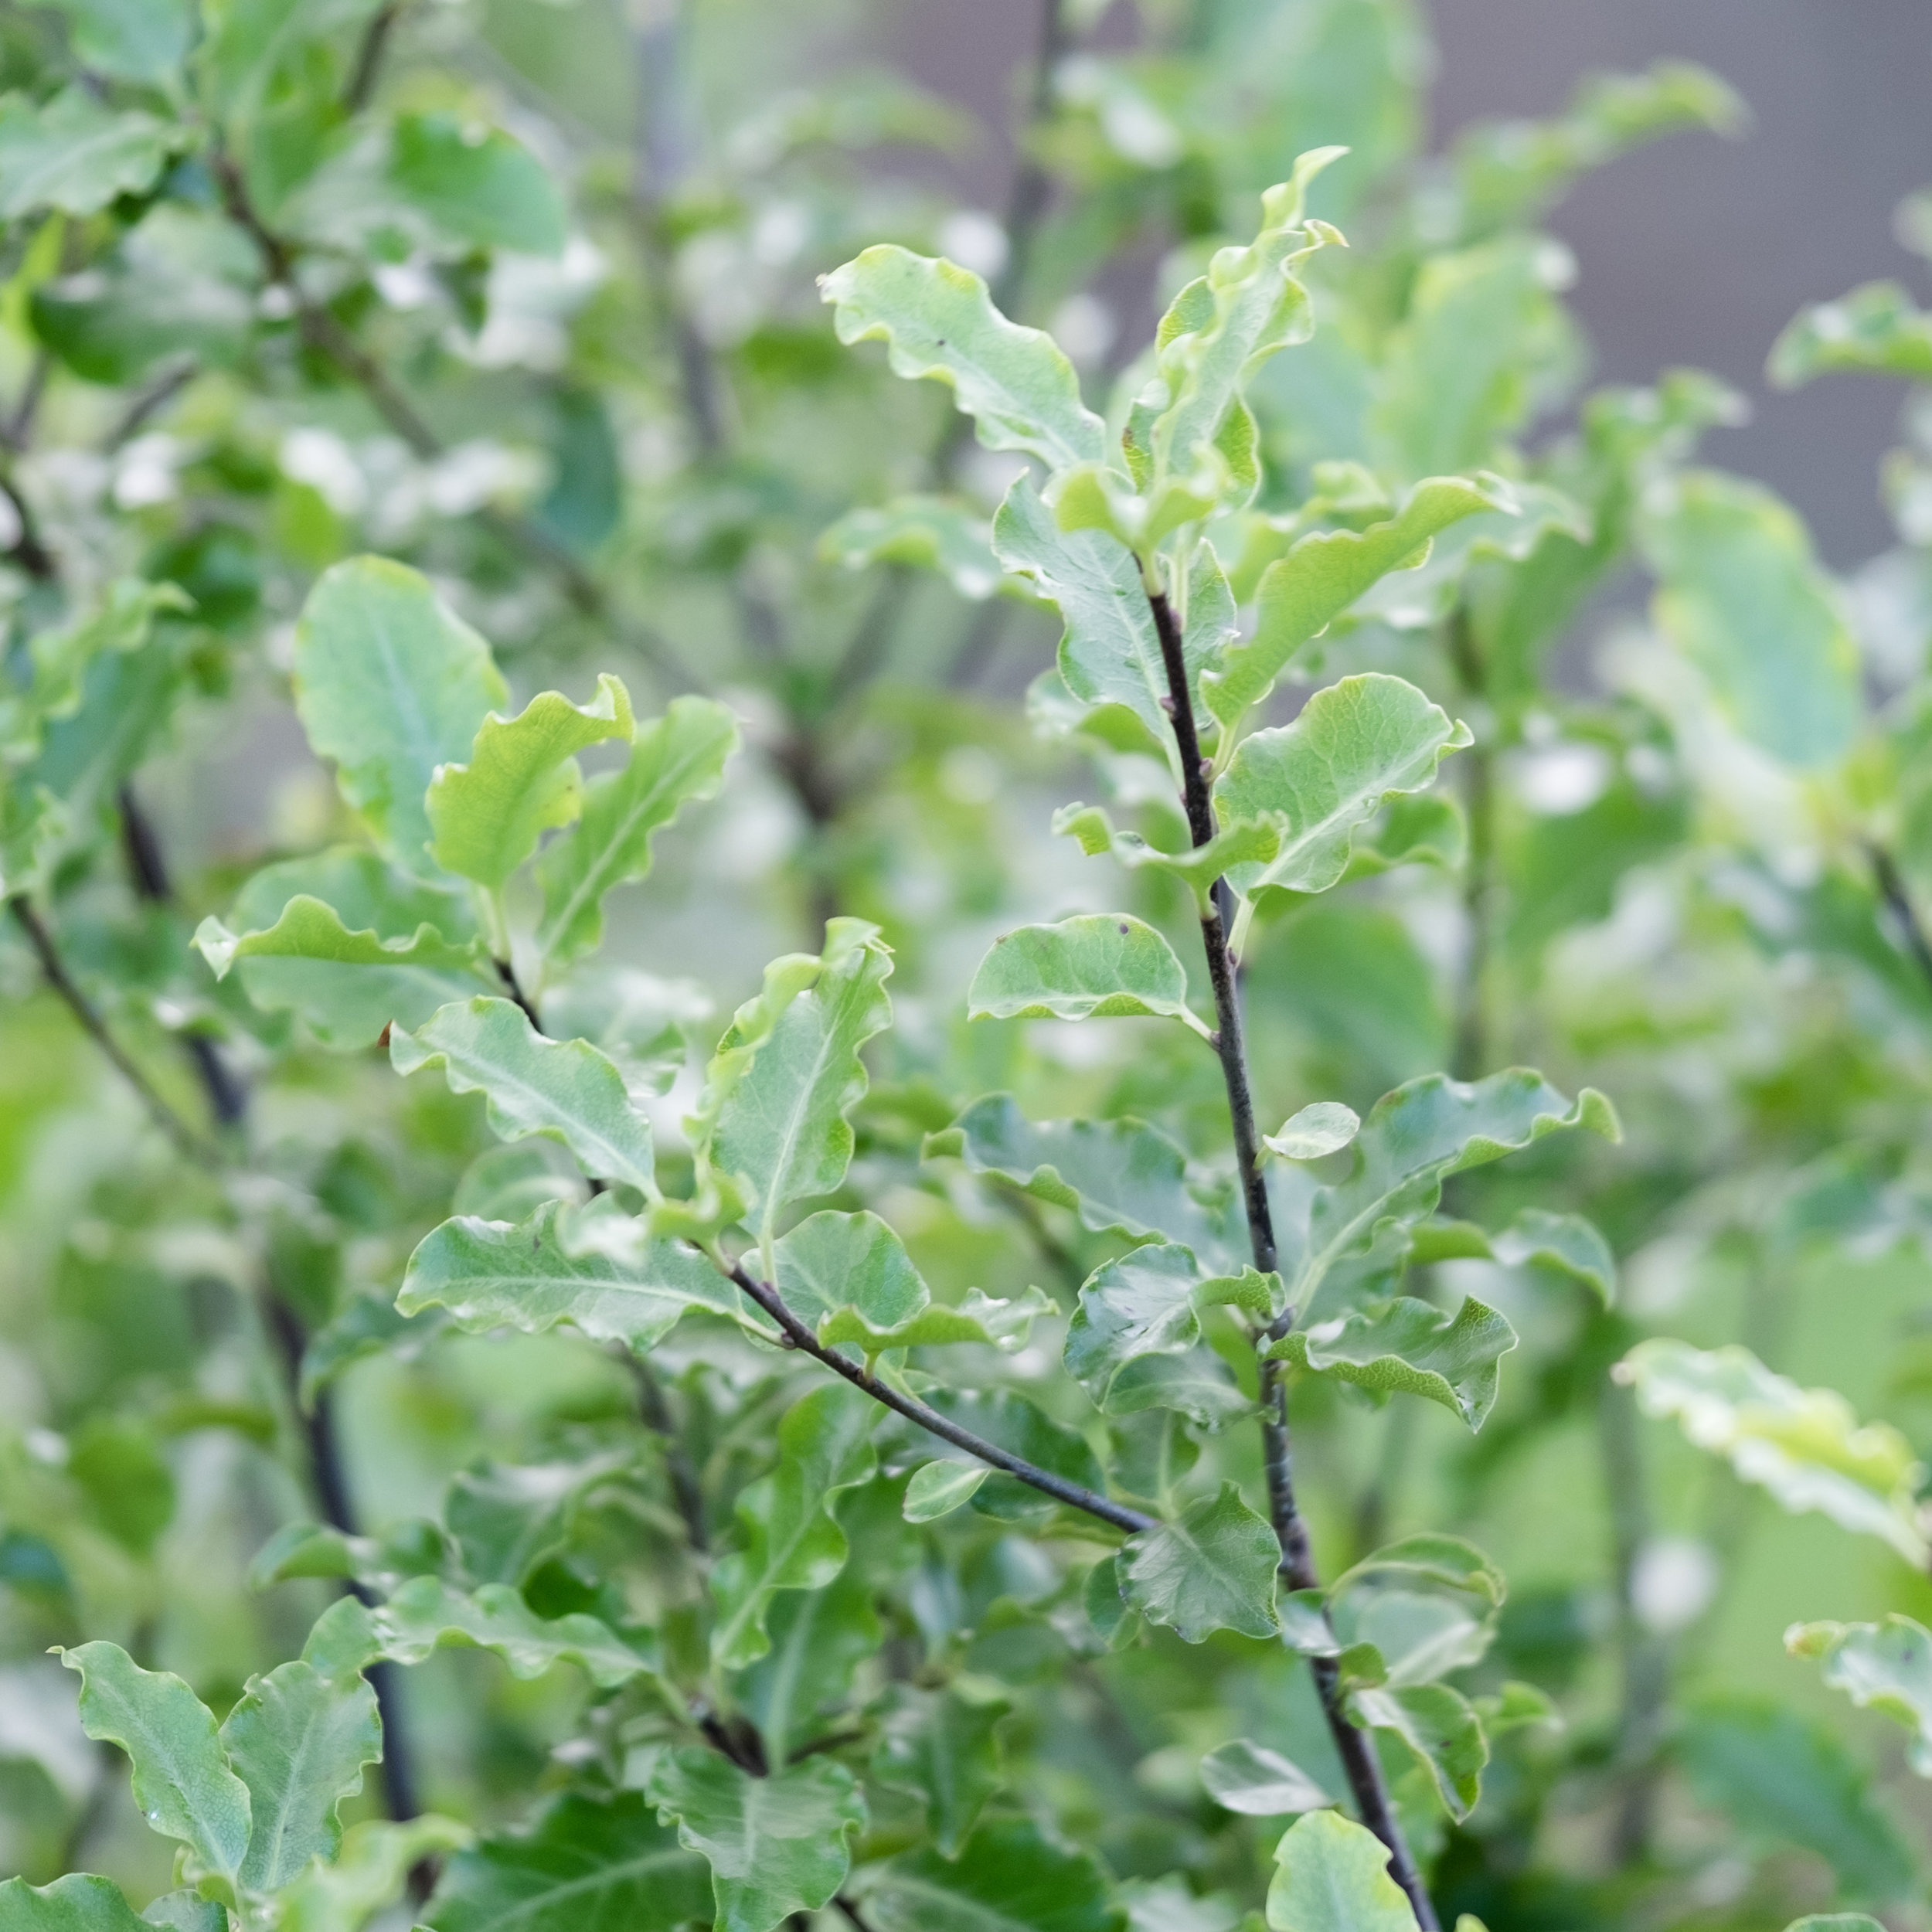
Pittosporum is a shrub that is hardy in most parts of the UK, and a lot of the varieties are fast growing. This one featured above is Pittosporum Tenuifolium, and can grow tree like if not pruned regularly, which is handy for growers and florists. It's best used in mid winter, when it is very hardy, and needs little conditioning. By March in most of the British Isles, it will be trying to grow new shoots, and so will flop when cut.
There are also variegated forms and purple leaved forms which are excellent for foliage backgrounds. This variety is Garnettii:
January shoot behind the scenes
For most of our 2016 photo shoots, there was a lot of planning for what flowers our florists would like to use and what would fit in with our colour themes. Then a last minute change of plans when something wasn't available, or something amazing flowered on the field that we had to use.

My job was to cut and condition the flowers and present our florists with amazing seasonal flowers to use. Emma and Vanessa were in charge of taking them to our chosen venue, helping the florist to make and set up their displays and then making, styling and shooting our themes.
They kept in touch with me by WhatsApp and sent me photos of what they were up to. Some of the behind the scenes shots, were just as good as the shoot scenes, so I thought Ii'd post some here, to show you what lengths they went too, to get the best shots of our British Flowers each month.

There wasn't a whole room in that beautiful wallpaper, but just enough to show off this display. Being January more light was actually needed than there was, so Vanessa was here working as Photographer's assistant

They spent ages making a wonderful fishing line background pattern, but then needed to lift the display up to include it in the background

and then they decided they didn't like the effect with the lights anyway, so it was removed

here's the end effect

The Colour Palette through the year
When I first started selling flowers to florists 4 years ago, I discovered very quickly that more often than not, they wanted a colour or a flower that wasn't available at the time they wanted it. Because of the wholesale markets being able to buy from all over the world, the natural colours of the year have been lost.
We know that the burnt oranges, purples and maroons are signs of Autumn
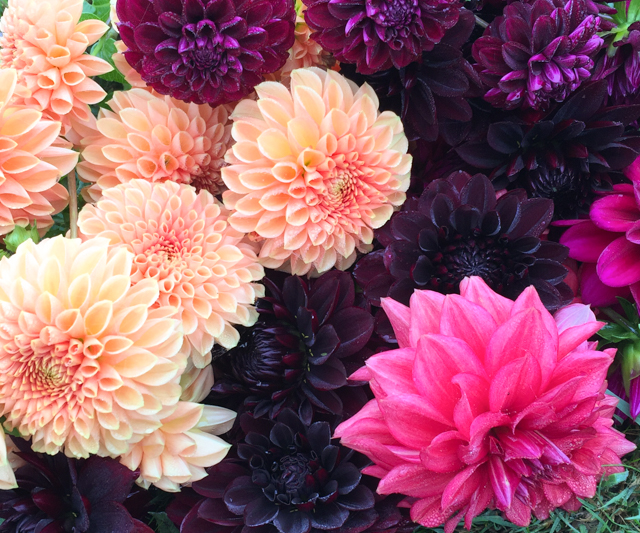
We know that a yellow daffodil is a sign of spring
But when's the best time of year to get peach coloured flowers? Or for true blue blooms?.
Throughout the year, we'll give you the colour palettes that work well each month with British Flowers. If there are plenty of varieties available in those shades at your event season, it will be easier to find them, and you are less likely to need to use several different suppliers or growers.
January florists profile Vanessa Birley of Vanessa Birley Florals
Throughout last season we worked with some talented and inspired florists who use British Flowers. Vanessa was the reason I started writing this book, and she, Emma and I worked very hard last year creating our floral palettes (more about these tomorrow). But she was also the first of our florists to be given a "bucket or 2" of flowers to produce some wonderful seasonal displays. Here in her own words is why she enjoys working with British Flowers.
Vanessa Birley: As a child I immersed myself in our family garden & you would often find me with my nose plunged into a posy of lavender or roses. For me, flowers that lack scent are missing the vital & important component that sets fresh flowers apart from other beautiful objects. I am absolutely guaranteed fragrance from British flowers, whether it’s from flowering mint, heady dill or sweet narcissus.

I began using locally grown flowers & foliage initially picking from my gardenin a search of adding movement & vibrancy to my bouquets. A trailing stem of jasmine or wispy movement of honeysuckle to a bridal bouquet, gave the je ne sais quoi that I had been looking for.
Not quite knowing what I’m going to get in terms of stem length, flower head size, precise colour & shape, adds to the charm & excitement of picking up a bucket or two of locally sourced British flowers.
The January shoot

Throughout the year in 2016, I gave a selection of talented florists a theme, and a bucket or 2 of British flowers, foliage and filler, and got them to "do their thing". The results were a wonderful collection of displays, bouquets, and arrangements using all British flowers that were available naturally in the month of the year. January was a green and white theme, which is even more apt this year, with the Pantone colour of the year being "Greenery"

The displays that were created were then styled by Vanessa Birley, and photos taken by Emma Davies, but the actual displays are no trickery, These are all January flowers available from Artisan farms, or from commercial growers in the middle of January.
